
1. Introduction
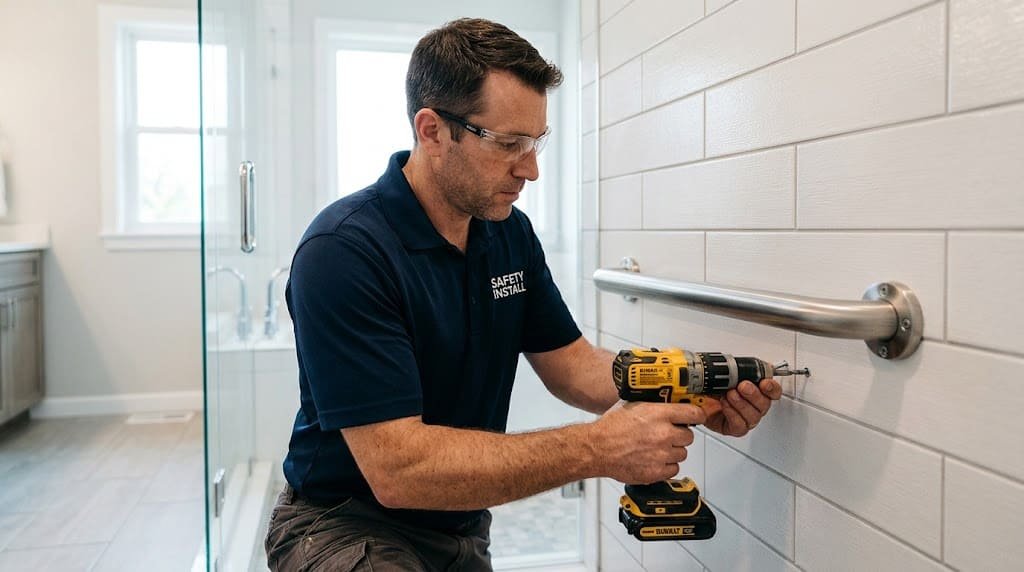
Bathroom grab bars provide a handhold for people who need extra support when entering a shower, stepping out of a bathtub, or changing position in the bathroom. However, a grab bar only provides dependable support when it is installed with the correct mounting hardware and secured to a suitable supporting structure.
This bathroom grab bar installation guide explains how to prepare for installation, locate wall studs, choose compatible fasteners, and mount grab bars on common bathroom surfaces. It also covers tile, drywall, fiberglass shower surrounds, post-installation checks, and situations where hiring a professional is the better option.
Before drilling, confirm the wall construction and check for concealed plumbing and electrical wiring. If you cannot verify the supporting structure or determine whether the proposed mounting system is suitable, pause and consult a qualified installer. A securely mounted grab bar requires more than a level position and tightly fitted screws.
Before starting the installation, review our complete guide to bathroom grab bars to understand the different types of grab bars, their uses, and how to choose one that suits your bathroom and support needs.
Table of Contents
2. What Does Secure Bathroom Grab Bar Installation Require?
Secure bathroom grab bar installation requires a suitable grab bar, compatible mounting hardware, adequate structural support, and correct installation according to the manufacturer’s instructions. The appropriate method depends on the wall construction, the bar’s mounting design, and where the bar will be used.
Understand What Supports the Grab Bar
A grab bar installation consists of several connected components, and each plays a different role.
- Grab bar: The handhold that provides support when a person changes position or maintains balance.
- Mounting flanges or plates: The components that connect the bar to the wall or its mounting system.
- Fasteners: Screws or other specified hardware that secure the mounting components.
- Supporting structure: Wood studs, properly installed blocking, or another structural support compatible with the mounting system.
- Wall material: Tile, drywall, fiberglass, acrylic, or any other surface where the mounting hardware will be installed.
- Sealant: A compatible sealing material used where required to help prevent water from entering the wall through mounting penetrations.
The visible wall surface is not necessarily the structure that supports the bar. For example, ceramic tile may cover drywall or a reinforced wall assembly. Drilling through the tile does not automatically provide a secure mounting point.
The entire grab bar assembly must be strong enough to withstand the forces placed on it during normal use. A strong grab bar attached with unsuitable fasteners or to an inadequate substrate cannot be assumed to provide reliable support.
Choose the Correct Mounting Method for Your Wall
Attaching a grab bar to suitable wood studs is a common installation method. Properly installed blocking can also provide support, while certain engineered mounting systems are designed for specific wall materials or conditions.
The right method depends on the actual construction.
- Wood studs: The mounting holes must align with suitable framing, and the specified fasteners must be appropriate for that installation.
- Reinforced walls: Properly installed blocking or other designed reinforcement can provide mounting support where ordinary stud placement is insufficient.
- Hollow walls: A purpose-designed mounting system may be suitable in some circumstances, but ordinary drywall anchors should not be assumed adequate for a grab bar.
- Fiberglass or acrylic surrounds: The installation must account for the enclosure and the structure behind it. The surround alone should not be assumed capable of supporting a grab bar.
If the desired location does not align with a stud, do not solve the problem by substituting a generic anchor without confirming its suitability. Consider an alternative location, proper reinforcement, or a mounting system specifically approved for the application.
Read the Manufacturer’s Installation Instructions
Always review the grab bar’s installation instructions before drilling. Different products can require different fasteners, hole dimensions, mounting sequences, and sealing methods.
Check the documentation for:
- Approved wall materials and mounting methods.
- Required fastener type, diameter, and length.
- Specified pilot-hole dimensions.
- Mounting-flange requirements and screw-hole layout.
- Any special instructions for tile, shower surrounds, or wet locations.
- Tightening, sealing, curing, and final inspection requirements.
Do not assume that the screws supplied with one grab bar are suitable for another model or for every wall assembly.
The manufacturer’s instructions should guide the installation, but they do not eliminate the need to confirm that the actual wall provides the required support.
Before choosing your mounting hardware, learn about the different types of bathroom grab bars to understand how their designs, mounting styles, and intended uses affect your selection.
3. Gather the Tools and Hardware You Need
Preparing the tools and mounting materials before starting helps reduce mistakes and avoids discovering a missing component after the wall has been drilled.
Essential Tools for Grab Bar Installation
The exact tool list depends on the wall material and mounting method, but a typical installation may require:
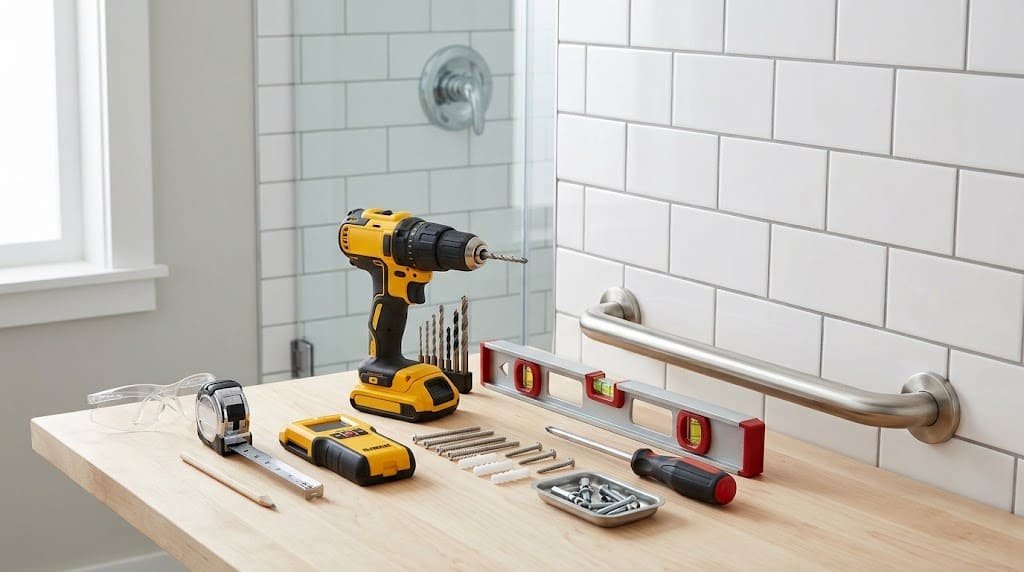
- Tape measure for checking dimensions and hole spacing.
- Pencil or removable marking tool for identifying mounting points.
- Level for checking alignment.
- Stud finder suitable for the wall construction.
- Drill and compatible drill bits.
- Appropriate tile-drilling bit when working through ceramic or porcelain tile.
- Screwdriver or driver compatible with the specified fasteners.
- Wear safety goggles and any other protective gear needed for the installation task.
- Cleaning supplies for removing drilling dust and preparing the mounting area.
Some installations require additional equipment or specialized tools. For example, a fiberglass enclosure may need a particular mounting system, while a tiled wall requires a drilling technique that protects the finish.
Choose Compatible Screws, Fasteners, and Mounting Hardware
Grab bar installation hardware must be compatible with the bar, the mounting system, and the supporting structure.
Review the following components before beginning:
- Mounting screws: Use the specified fasteners or approved replacements appropriate for the application.
- Mounting flanges and plates: Confirm that all required components are present and fit the bar correctly.
- Wall anchors: Use only an anchoring system documented as suitable for the particular wall construction and grab bar.
- Specialized mounting kits: Some products use engineered systems with their own hardware and installation requirements.
- Sealant: Where required, select a product compatible with the wall finish, enclosure, and mounting materials.
There is no single screw length or pilot-hole size that is correct for every bathroom grab bar. The necessary dimensions depend on the fastener design, the thickness of the materials, the supporting structure, and the manufacturer’s instructions.
Avoid reusing damaged fasteners, mixing incompatible hardware, or shortening a screw merely because it is difficult to install. If the supplied hardware does not suit the verified wall construction, identify an approved alternative before proceeding.
Prepare the Bathroom and Protect the Wall Surface
Clear the work area so that tools and materials can be handled safely. Protect the bathtub, shower base, nearby fixtures, and flooring from dropped tools and drilling debris.
Before making holes:
- Inspect the wall for cracks, loose tiles, damaged grout, and signs of water intrusion.
- Identify the intended mounting locations and check for concealed utilities.
- Confirm that the mounting method suits the wall structure.
- Verify that the bar’s mounting holes align with the planned support.
- Collect the appropriate mounting hardware, drill bits, and sealant recommended by the manufacturer.
If there are signs of hidden water damage, deteriorated framing, or uncertain wiring and plumbing locations, resolve these issues before installation. Covering a damaged wall with a mounting flange does not correct an underlying structural problem.
4. Plan the Grab Bar Location and Find the Wall Support
Before installing a grab bar, determine where it will be most useful and confirm that the wall can support the proposed mounting method. The best location must work for the person using the bar while allowing the mounting hardware to connect securely to the intended support.
Choose the Location Based on the Intended User’s Needs
Grab bar placement should reflect the movement for which the bar is intended to provide support. A bar used when stepping into a bathtub may need a different position from one used to rise from a toilet or maintain balance while showering.
Consider:
- Where the user needs a stable handhold during entry and exit.
- Whether the bar will help with sitting, standing, or changing position.
- Whether the bar can be reached comfortably from the intended position.
- Whether the bar’s shape and orientation suit its intended purpose.
- Whether nearby fixtures or surfaces interfere with gripping the bar.
The installation location should not be chosen solely because it aligns with a stud. If the ideal position and available wall support do not align, evaluate a suitable alternative mounting arrangement rather than compromising the installation.
For more detailed guidance on choosing a suitable position, see our guide to bathroom grab bar placement.
Locate the Studs and Confirm Their Centers
When the grab bar is designed for stud mounting, identify the studs behind the wall before marking the mounting holes.
A stud finder can help locate framing, but its readings should be verified. Wall finishes, moisture, metal components, and other obstructions can affect detection. Follow the tool’s instructions and use additional verification methods when necessary.
A practical approach is to:
- Scan the proposed area to locate the likely stud edges.
- Mark the stud boundaries lightly.
- Identify the center of the stud rather than relying on a single detection signal.
- Check that the intended mounting holes will align with suitable support.
- Confirm that the proposed screw locations will not intersect concealed utilities.
Do not assume that every wall has conventional wood studs or that framing follows a predictable spacing pattern. Older buildings, masonry construction, unusual framing, and previous renovations may require a different assessment.
If you cannot reliably identify the supporting structure, have the wall inspected before drilling.
Check the Mounting-Hole Alignment
Place the grab bar or its mounting template against the wall in the planned position. Use a level where appropriate and mark the mounting holes according to the manufacturer’s instructions.
Check all mounting points, not just the first one. A flange may appear to align correctly while one or more screw holes miss the intended support.
Before drilling, verify that:
- The bar is positioned as intended.
- The mounting holes align with the approved support or mounting system.
- The flange sits properly against the mounting surface.
- The bar will not interfere with doors, shower fixtures, or other bathroom features.
- The installation can be completed without forcing the bar or distorting its mounting components.
If the mounting holes do not align with suitable support, stop and reconsider the location or mounting approach.
Check for Plumbing, Electrical Wiring, and Other Hidden Obstructions
Bathroom walls can contain water supply lines, drainpipes, electrical wiring, and other concealed components. These may be located near showers, tubs, sinks, and other fixtures.
Use suitable detection methods and review available information about the wall before drilling. A stud finder alone may not reliably identify every concealed utility.
Pay particular attention to areas near plumbing fixtures and electrical equipment. If you are unsure where a pipe or electrical wire runs, avoid drilling in that area until its location has been safely confirmed. A qualified professional can help identify the obstruction and determine a safe mounting location.
Important: Do not move a mounting hole slightly and assume the new location is safe. Verify both the structural support and the absence of concealed hazards before proceeding.
Before marking the mounting holes, review our guide to bathroom grab bar height and positioning to understand how the bar’s placement can affect reach, balance, and safe use.
5. Step-by-Step Guide to Installing Bathroom Grab Bars Securely
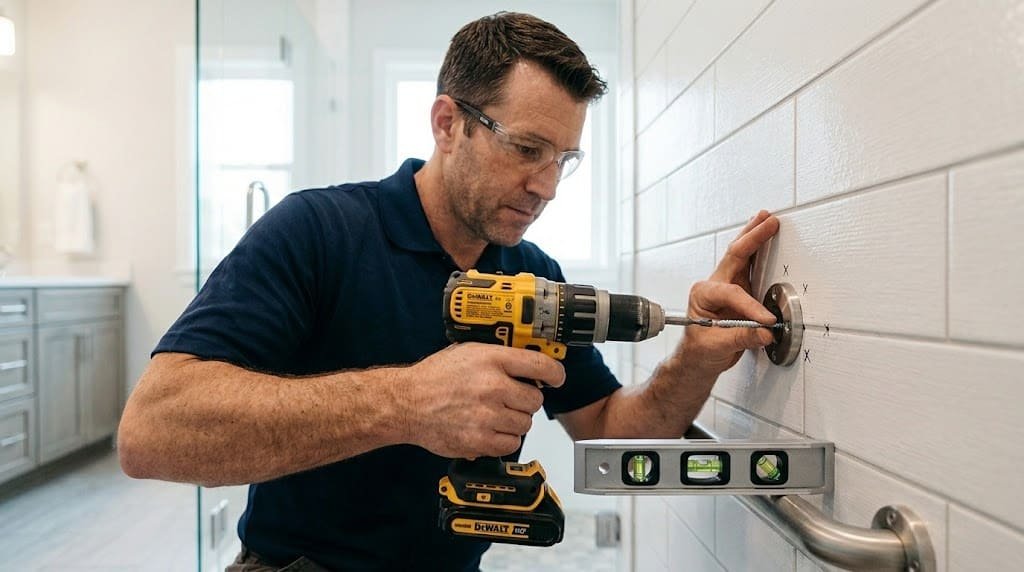
Once the wall structure, mounting location, and hardware have been verified, you can follow the appropriate installation procedure. The steps below describe the general process; the product’s instructions and the wall construction determine the exact drilling, fastening, and sealing requirements.
Step 1 — Position the Grab Bar and Check Alignment
Hold the grab bar in the planned position or use the manufacturer’s mounting template. Check its orientation and use a level if the installation calls for one.
Confirm that the bar can be gripped comfortably from the intended position and that its mounting flanges sit correctly against the wall.
For a shower or bathtub installation, also consider the enclosure’s shape, nearby fixtures, and the user’s movement into and out of the bathing area.
Do not proceed if the bar’s position prevents the mounting hardware from reaching suitable support.
Step 2 — Mark the Mounting Holes
Mark each mounting hole carefully with a pencil or another marking method appropriate for the surface.
If the manufacturer supplies a template, follow its instructions and verify the template’s orientation before marking. Templates can help maintain consistent spacing, but they do not confirm that the wall behind each hole is structurally suitable.
Check the marks against the stud locations or approved mounting system. Recheck the alignment before drilling, because correcting a misplaced hole can be especially difficult on finished tile.
Step 3 — Drill the Holes Using the Correct Method
Choose the drill bit and technique specified for the wall material and mounting hardware.
For example, drilling through tile requires a suitable tile bit and controlled technique. Once the tile has been penetrated, the material behind it may require a different drilling method. The required bit can change depending on whether the substrate is wood, masonry, or another material.
General precautions include:
- Use the correct bit for each material.
- Follow the manufacturer’s specified hole dimensions.
- Avoid excessive pressure that could crack or damage the surface.
- Protect the surrounding finish and keep the work area clear.
- Stop if you encounter an unexpected obstruction or discover that the wall differs from what you expected.
Do not drill larger holes simply to make a fastener fit. Hole dimensions are part of the mounting system’s design, and an incorrectly sized hole may compromise the installation.
Step 4 — Install the Specified Fasteners or Mounting System
Follow the manufacturer’s directions to fit the required anchors, screws, and mounting hardware correctly.
For a conventional stud-mounted bar, the mounting screws must engage the intended structural support with the specified installation method. For an engineered alternative, every required component must be installed in the prescribed sequence and within its approved application.
Before fastening, make sure the holes are correctly positioned and the mounting surfaces are suitable. Do not substitute generic drywall anchors or ordinary screws simply because they are readily available.
If a fastener spins without tightening, fails to engage the support, or encounters unexpected resistance, stop. Investigate the cause instead of forcing the fastener into place.
Step 5 — Secure the Grab Bar and Fit the Covers
Align the grab bar with the mounted supports, then fasten it according to the manufacturer’s instructions.
Tighten the fasteners in the specified sequence. Use the appropriate tool and tightening method, taking care not to damage the screw heads, mounting flanges, wall finish, or enclosure.
If the bar has decorative covers, fit them only after the required fasteners have been installed and inspected. The covers should conceal the mounting hardware without preventing proper inspection or interfering with the bar’s mounting components.
A flange that sits unevenly, a screw that will not tighten correctly, or a bar that moves during assembly indicates that the installation needs further investigation.
Step 6 — Seal the Mounting Penetrations Where Required
Mounting holes in a shower or other wet area can provide a path for water to enter the wall. Where the product and wall assembly require sealing, use a compatible sealant and follow the specified application procedure.
Check the instructions for the appropriate sealing location, material compatibility, and curing time. Some systems have particular requirements for sealing behind mounting flanges or around penetrations.
Do not assume that applying sealant around the outside of a flange will correct an unsuitable mounting method or an improperly prepared hole. Sealant helps prevent water from entering through mounting holes, but it cannot replace the solid structural support needed to secure a grab bar.
Allow the sealant to cure as directed before exposing the installation to water. If the wall already shows signs of water damage, repair the underlying problem before installing the bar.
Step 7 — Inspect the Completed Installation
Before allowing anyone to rely on the grab bar, inspect the installation carefully.
Check that:
- All required fasteners are present and installed as instructed.
- The mounting flanges sit properly against the wall.
- There is no visible cracking, looseness, or damage around the mounting points.
- The bar is correctly assembled and aligned.
- Required seals are complete and allowed to cure.
- The installation complies with the manufacturer’s specified checks.
Follow any additional inspection or stability-check procedure supplied with the product. Do not substitute an improvised load test for the manufacturer’s procedure.
If the bar moves, a fastener loosens, the wall cracks, or the mounting system behaves unexpectedly, do not use it for support until the problem has been identified and corrected.
Before installing a grab bar, check its manufacturer-rated capacity and the mounting conditions required for that rating. Our guide to bathroom grab bar weight capacity explains how to interpret product ratings and what to check before choosing a model.
6. How to Install Grab Bars on Tile, Drywall, and Fiberglass
The correct bathroom grab bar mounting method depends on both the visible surface and the structure behind it. Tile, drywall, fiberglass, and acrylic present different installation challenges, so a technique suitable for one wall should not automatically be applied to another.
Installing Grab Bars on a Tiled Bathroom Wall
Installing grab bars on tile requires two separate considerations: protecting the tile while drilling and securing the mounting hardware to an appropriate supporting structure.
Tile can crack if drilled with an unsuitable bit, excessive pressure, or an inappropriate technique. However, preventing tile damage alone does not make the finished grab bar secure.
Before drilling:
- Confirm that the proposed mounting points align with suitable support.
- Check the grab bar and drill-bit instructions for the tile type.
- Mark the holes carefully and protect the surrounding finish.
- Drill using the specified technique without applying unnecessary pressure.
- Follow the instructions for drilling into the material behind the tile.
- Install the approved fasteners and complete any required sealing.
Do not assume that grout lines are suitable mounting points or that a tile wall provides adequate structural support on its own. If the tile is loose, cracked, or separating from the substrate, address the condition before installation.
Installing Grab Bars on Drywall
Drywall is a wall finish, and ordinary drywall alone should not be assumed capable of supporting a grab bar used for body support.
When drywall is attached to wood studs, you may be able to use a grab bar designed for stud mounting, provided the studs, screw locations, and hardware meet the manufacturer’s installation requirements.
If there is no suitable stud at the intended location, the solution requires more consideration. Depending on the wall and product, the options may include relocating the bar, installing appropriate structural blocking, or using a mounting system specifically designed and approved for the application.
Do not treat all hollow-wall anchors as equivalent. Their suitability depends on their design, the substrate, installation conditions, and the manufacturer’s documented application. A general-purpose anchor should not be substituted for a grab bar mounting system without evidence that it is appropriate.
Installing Grab Bars in a Fiberglass or Acrylic Shower
Fiberglass and acrylic shower surrounds need particular care because the visible enclosure may be flexible and may not provide adequate support by itself.
A secure installation must account for the surround, the framing or reinforcement behind it, and the mounting system’s design. Some installations may require specialized hardware or access to the structure behind the enclosure.
Before beginning, determine:
- Whether the enclosure manufacturer permits the proposed installation.
- What structure is available behind the surround.
- Whether the grab bar’s mounting system is compatible with that construction.
- How the installation penetrations must be sealed.
- Whether access or reinforcement work is needed.
Do not assume that drilling through the surround and adding an ordinary wall anchor will produce a secure installation. If the supporting structure cannot be confirmed, seek assistance from a qualified installer familiar with shower enclosures and grab bar mounting.
What to Do When No Stud Is Available at the Desired Location
When the desired grab bar position does not align with a suitable stud, you have several possible options, but they are not interchangeable.
| Option | When to consider it | Key point to remember |
|---|---|---|
| Choose a different mounting location | Another nearby position can provide the required support without compromising accessibility. | Confirm the new position, available clearance, and alignment of the mounting points before drilling. |
| Install structural reinforcement | The wall can be opened or accessed to add suitable support behind the mounting surface. | The reinforcement must be securely connected to the building’s structure and installed correctly. |
| Use a purpose-designed mounting system | The manufacturer confirms that the system is suitable for the specific wall material and application. | Check the approved substrate, required fasteners, installation method, and product limitations. |
| Consult a qualified installer | The wall construction is uncertain, access is restricted, or additional reinforcement may be necessary. | Ask how the grab bar will be anchored and how the installer will verify that the completed installation meets the product requirements. |
The safest solution is the one that meets both the user’s positioning needs and the mounting system’s structural requirements.
If those requirements cannot be satisfied at the desired location, do not improvise with unverified hardware. A professional may be able to add reinforcement or recommend an appropriate alternative.
7. How to Install Grab Bars in Showers and Bathtubs
Installing a grab bar in a shower or bathtub area involves more than choosing the right spot. You must consider the wall’s structural strength, moisture exposure, and the type and condition of the enclosure. Even a well-positioned grab bar may not provide dependable support if its mounting hardware is not properly anchored to a suitable backing system.
Installing Grab Bars in a Shower That’s Already Built
You can install a grab bar in an existing shower, provided the wall construction and mounting system allow a suitable installation. The main challenge is determining what lies behind the finished wall without unnecessarily damaging the shower.
Start by identifying the surround material, available structural support, and mounting requirements for the chosen grab bar. Existing tile, waterproofing layers, plumbing, and limited access to framing can complicate the work.
A practical approach is to:
- Inspect the shower wall for cracks, loose tile, deteriorated grout, or signs of moisture damage.
- Determine the likely location and type of structural support.
- Check the proposed mounting points for concealed utilities.
- Confirm that the grab bar and fasteners are compatible with the wall construction.
- Follow the product-specific drilling, mounting, and sealing instructions.
- Complete the required inspection before the bar is used.
If the installation requires opening the wall, adding reinforcement, or repairing waterproofing, professional assistance may be appropriate.
Installing Grab Bars Around a Bathtub
Bathtub grab bar installation follows the same basic principle as other installations: the mounting system must connect securely to suitable support. However, the location and shape of the tub surround can affect the work.
Consider whether the bar is intended to help someone enter the tub, exit it, or maintain a stable handhold while bathing. The bar’s location must suit that movement without compromising the mounting requirements.
Before drilling, verify the wall material, stud or reinforcement locations, and possible plumbing routes. If the bathtub has a fiberglass or acrylic surround, confirm that the proposed mounting method is designed for that construction.
Avoid positioning a bar solely for convenience if the mounting points cannot be secured appropriately. If the ideal location conflicts with the available support, evaluate an approved mounting solution or consult an installer.
For broader guidance on preventing bathing-related hazards, see our article on Shower and Bathtub Safety.
Seal Mounting Holes to Help Protect Against Water Intrusion
Mounting penetrations in wet areas can allow water to enter the wall if they are not properly sealed where sealing is required.
Use a sealant compatible with the shower enclosure, wall finish, and mounting system. Follow the manufacturer’s instructions for preparing the surface, applying the sealant, and allowing it to cure.
Keep these distinctions in mind:
- Sealant helps limit water intrusion; it does not provide structural support.
- The correct sealing procedure may vary by product and wall assembly.
- Existing waterproofing damage should be addressed rather than concealed.
- The bar should not be exposed to water before any required curing period is complete.
If the installation instructions do not clearly explain how the mounting penetrations should be sealed in your particular shower assembly, obtain clarification before proceeding.
When to Hire a Professional for Shower or Bathtub Grab Bar Installation
Professional installation is worth considering when the job involves uncertain framing, damaged tile, a flexible shower surround, inaccessible mounting locations, or possible interference with plumbing or wiring.
A qualified installer can assess whether the wall needs reinforcement, identify an appropriate mounting system, and address any necessary surface or waterproofing repairs.
Ask the installer to explain how the bar will be supported, which hardware will be used, how penetrations will be sealed, and how the finished installation will be checked.
If you cannot verify that the wall and mounting system are suitable, do not proceed simply because the grab bar appears easy to attach.
8. How to Check a Grab Bar After Installation
A grab bar should not be considered ready for use simply because it looks level or its screws appear tight. The finished installation must comply with the product’s mounting requirements and pass the specified inspection and stability checks.
Inspect the Mounting Hardware and Surrounding Wall
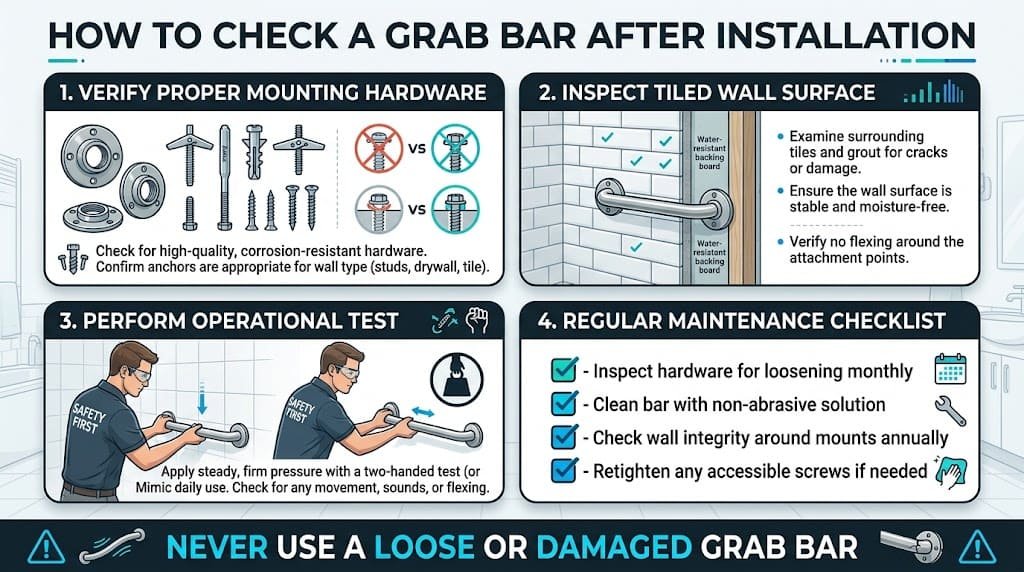
Start with a visual inspection of the entire installation.
Look for:
- Loose, missing, damaged, or improperly seated fasteners.
- Mounting flanges that do not sit correctly against the wall.
- Cracked tile, damaged drywall, or a flexing shower surround.
- Gaps or deterioration around penetrations that should be sealed.
- Misaligned components or covers that interfere with the mounting assembly.
A visual inspection can reveal obvious problems, but it cannot independently confirm that hidden framing or fasteners provide adequate support.
If something appears incorrect, do not assume that tightening every screw will fix it. The cause may be a misplaced hole, an unsuitable anchor, damaged material, or inadequate reinforcement.
Even when a grab bar is installed carefully, loose mounting hardware, wall damage, corrosion, or other issues can develop over time. Learn how to identify the causes and decide what to do in our guide to common bathroom grab bar problems.
Follow the Manufacturer’s Stability-Check Instructions
Use the inspection and stability-check procedure specified by the grab bar manufacturer or mounting-system documentation.
Avoid testing the grab bar by hanging on it, placing an unmeasured load on it, or using your body weight to check its strength. These informal methods cannot confirm that the bar is properly installed and may cause the mounting system to loosen or fail.
The U.S. Access Board’s accessibility guidance and the applicable ADA Standards provide technical requirements for grab bars in covered facilities. Those requirements should not be confused with a universal homeowner test procedure for every residential grab bar. U.S. Access Board: Plumbing Elements and Facilities provides additional context on accessibility requirements.
If the product documentation does not provide a clear inspection method, contact the manufacturer or a qualified installer for guidance.
Correct Problems Before Allowing Anyone to Use the Bar
Do not rely on a grab bar that moves, loosens, or shows signs of mounting failure.
Stop using the bar for support if you notice movement, damaged fasteners, cracking around the mounting points, or separation between the mounting flange and the wall.
The corrective action depends on the cause. It may require replacing damaged hardware, repairing the wall, adding proper reinforcement, or reinstalling the bar with a suitable mounting system.
Simply tightening a loose screw may not solve the problem if the screw no longer engages the supporting material properly.
Recheck the Installation When Required
Follow the manufacturer’s maintenance and inspection recommendations. Periodic checks can help identify loosening, corrosion, seal deterioration, or changes in the surrounding wall.
Pay particular attention after nearby plumbing work, enclosure repairs, or other changes that may affect the mounting area.
If the grab bar becomes loose or the wall develops signs of moisture damage, stop relying on it until the cause has been assessed and corrected.
9. DIY vs. Professional Grab Bar Installation: Cost and Safety
Whether to install a grab bar yourself depends on the wall construction, mounting system, available tools, and your ability to follow the instructions accurately. A straightforward installation on verified structural support may be manageable for an experienced DIYer, while an uncertain wall or complex shower enclosure can require professional work.
When DIY Installation May Be Appropriate
DIY installation may be reasonable when:
- The wall construction and supporting structure are understood.
- The proposed mounting method is approved for the application.
- The mounting holes align with the intended support.
- The required tools and compatible hardware are available.
- There are no unresolved concerns about hidden utilities or wall damage.
- You can follow the manufacturer’s instructions precisely.
Before beginning, assess the entire job rather than just the drilling. A seemingly simple installation can become more complicated if the studs do not align, the tile is damaged, or the enclosure requires reinforcement.
If the mounting method cannot be verified, postpone the installation until you have a reliable solution.
When to Hire a Professional Installer
Professional grab bar installation is advisable when the work requires expertise or access beyond your capabilities.
Consider hiring an installer if:
- The wall structure or stud locations cannot be confirmed.
- The desired position does not align with suitable support.
- Structural blocking or reinforcement is needed.
- The installation involves a complex fiberglass or acrylic enclosure.
- The tile is damaged, unstable, or likely to crack during installation.
- Plumbing or electrical wiring may be located behind the proposed mounting points.
- Any water damage or compromised waterproofing must be repaired before installing the grab bar.
When evaluating an installer, ask about their experience with grab bars, wall reinforcement, shower enclosures, and the specific mounting system being considered.
Before using the grab bar, ask yourself: How can you confirm that it is securely attached using a mounting system designed for your specific wall type? A clear answer should explain the support method, hardware, and inspection process rather than relying on appearance alone.
What Affects Bathroom Grab Bar Installation Cost
The cost of bathroom grab bar installation varies with the job’s complexity, the number of bars, local labor rates, and the condition of the wall.
Common cost factors include:
- Number of grab bars: Installing several bars during the same visit may affect the overall labor cost.
- Wall material: Tile and specialized shower surrounds can require additional tools, care, or preparation.
- Adding extra support: Installing wood blocking or similar reinforcement may involve opening the wall to reach its internal framing.
- Repairs: Damaged tile, deteriorated framing, or failed waterproofing may add work.
- Accessibility and access: Difficult-to-reach mounting locations can increase installation time.
- Local labor rates: Pricing varies by location and service provider.
Review the details covered by each quote before deciding which offer provides the best value. One installer may quote only for mounting the bar, while another may include reinforcement, sealing, and surface repairs.
Request an itemized estimate that identifies the mounting method, hardware, additional repairs, and any exclusions. Verify current local pricing before budgeting; a generic national estimate may not reflect the requirements of your particular bathroom.
Questions to Ask Before Hiring an Installer
Before approving the work, ask:
- How will you identify and verify the supporting structure?
- What mounting system and fasteners will you use?
- Is the proposed method suitable for this wall material and grab bar?
- Will the installation require reinforcement or access behind the wall?
- How will the mounting penetrations be sealed in a wet area?
- Are tile repairs, waterproofing work, and other repairs included in the estimate?
- How will you inspect the finished installation?
- What routine maintenance and periodic checks does the manufacturer advise?
Clear answers help you compare installers on more than price alone.
10. FAQs
Can You Install Grab Bars Without Wall Studs?
Yes, some grab bars can be installed without conventional stud mounting, but only when the selected mounting system is specifically suitable for the wall construction and intended application. Certain engineered systems may accommodate particular hollow-wall or enclosure conditions. Do not assume that a general-purpose drywall anchor can safely support a grab bar.
What Screws Should Be Used to Install Bathroom Grab Bars?
Use the fasteners specified by the grab bar manufacturer or an approved alternative documented as suitable for the particular mounting system and supporting structure. Screw type, length, diameter, and installation requirements depend on the wall construction and hardware. Ordinary drywall screws or generic replacement screws should not be substituted without confirming compatibility.
Can Grab Bars Be Installed Directly on Drywall?
Drywall alone should not be assumed to provide adequate support for a grab bar used to support body weight. A suitable installation commonly secures the mounting hardware to structural framing or properly installed reinforcement. A purpose-built alternative may work in some situations, provided the manufacturer’s documentation confirms that it is suitable for the specific installation.
Can You Install Grab Bars on Tile Without Cracking It?
Yes, tile can often be drilled successfully with the appropriate bit, technique, and precautions. The correct approach depends on the tile material and the substrate behind it. Avoid excessive pressure, follow the relevant instructions, and verify the mounting support before drilling. If the tile is already loose or cracked, address that problem first.
How Do You Know if a Grab Bar Is Installed Correctly?
A correctly installed grab bar uses a mounting system appropriate for the wall and is installed according to the manufacturer’s instructions. Its fasteners and mounting flanges should be properly fitted, the surrounding surface should show no signs of damage, and any required seals should be complete. Follow the specified stability checks; visual appearance alone cannot verify concealed structural support.
When Should You Hire a Professional to Install Grab Bars?
Hire a qualified professional when you cannot verify the wall structure, the desired position lacks suitable support, reinforcement is required, or the installation involves a difficult shower enclosure, damaged tile, or uncertain concealed utilities. Professional help is also appropriate when you cannot confidently follow the manufacturer’s mounting instructions.
11. Conclusion
Successful bathroom grab bar installation starts with understanding the wall, selecting compatible mounting hardware, and confirming that the bar can be secured to suitable support. Careful positioning, appropriate drilling techniques, correct fastening, and proper sealing where required all contribute to a dependable installation.
Before using a newly installed grab bar, inspect the mounting components and surrounding wall, follow the manufacturer’s specified stability checks, and correct any signs of movement or damage. Remember that a level bar with tight-looking screws is not necessarily securely mounted.
If you cannot verify the wall structure, need additional reinforcement, or are unsure how to mount a bar on tile or a shower enclosure, consult a qualified installer. The goal is not simply to attach a grab bar to the wall, but to create a reliable handhold using a mounting system suitable for the intended use.
5 Comments