
1. Introduction
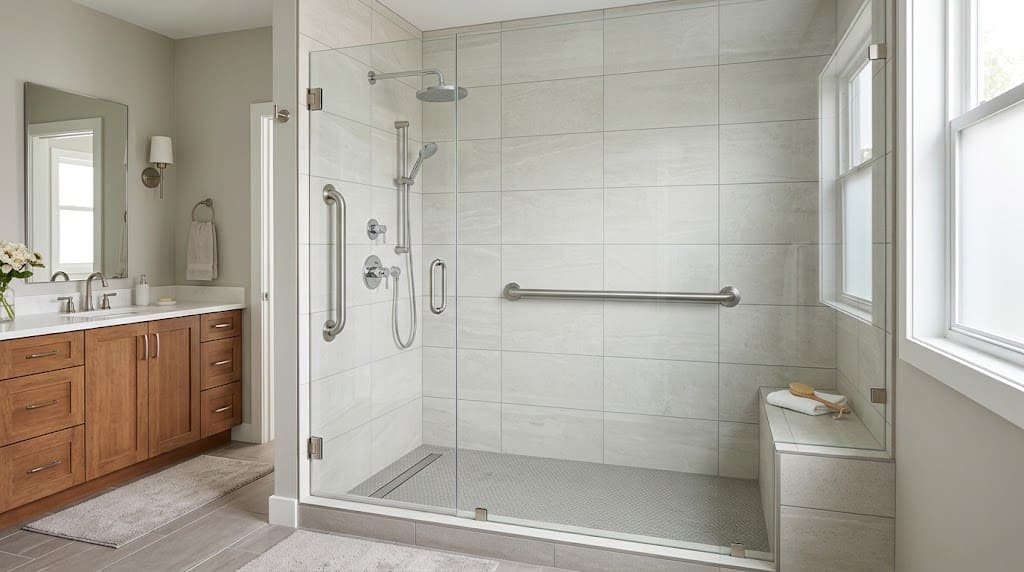
Bathroom grab bar placement is about putting secure handholds where a person needs support when entering a shower, stepping into a bathtub, sitting on a toilet, or standing up again. The right locations depend on the bathroom layout, the user’s balance and reach, and the movements that feel difficult or unstable.
The three main areas to assess are the shower, bathtub, and toilet. Each may require a different combination of horizontal, vertical, or angled grab bars. Correct height and positioning matter, but so does the wall structure behind the mounting surface. A bar installed in the wrong place or attached without suitable support may not provide the assistance someone expects.
This guide explains where to place bathroom grab bars, which measurements to consider, how accessibility standards differ from typical residential choices, and what to check before using a newly installed bar.
If you’re still deciding which type of grab bar suits your bathroom, read our complete guide to bathroom grab bars to learn more about the available options and key features to consider.
Table of Contents
2. Where in the Bathroom Should You Install Grab Bars?
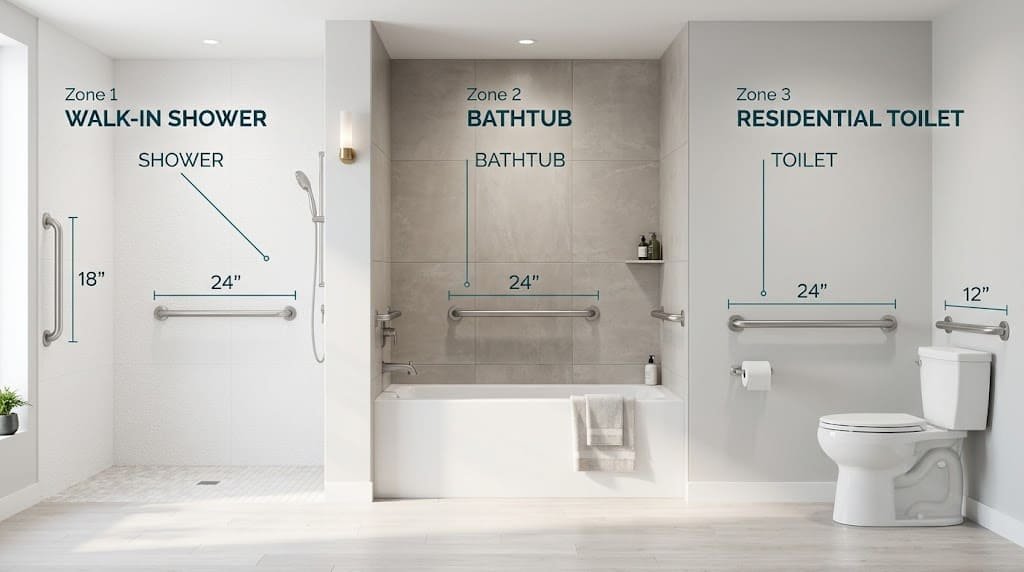
Grab bars should generally be positioned beside the areas where a person needs help entering, exiting, lowering themselves, rising, or transferring between surfaces. The most common locations are the shower walls and entrance, the long wall and entry area of a bathtub, and the side or rear of a toilet.
Use the following locations as a starting point:
| Bathroom area | Placement to assess | Main purpose |
|---|---|---|
| Shower entrance | Near the entry where the user can reach it before stepping in or out | Support during entry and exit |
| Shower interior | On suitable walls within comfortable reach | Help with standing balance and movement |
| Bathtub | Along the tub wall and near the entry, as appropriate | Support when lowering into the tub or stepping over the rim |
| Toilet | Beside the toilet and, where appropriate, behind it | Assistance when sitting, standing, or transferring |
| Transfer area | Near the surface the user is moving to or from | Support during a specific movement |
The best arrangement is not necessarily the one with the most grab bars. It is the one that places reliable support within reach at the moments it is needed.
Before deciding on locations, observe how the person normally uses the bathroom. Consider which hand they use for support, where they stand before sitting, which direction they turn, and whether they need help with balance or a seated transfer. A bar that looks conveniently placed while the bathroom is empty may be difficult to reach when a shower seat, toilet, or door is in use.
Also consider the bathroom’s dimensions, wall construction, fixtures, and applicable accessibility requirements. Placement should be planned before drilling, particularly when several bars need to work together.
3. Where to Place Grab Bars in a Shower
Shower grab bars should provide support at the entrance and at useful positions inside the shower. The exact arrangement depends on the opening, wall locations, shower controls, seating, and the user’s movements. A single bar may not support every stage of entering, standing, turning, and exiting.
Grab Bar Placement at the Shower Entrance
Place an entrance grab bar where the user can reach it before stepping across the shower threshold or moving through the opening. The bar should be accessible from the approach side and positioned so that the user can maintain a secure hold while moving through the entrance.
For a walk-in shower, consider the location of the opening, the direction of travel, and any door or curtain. A bar hidden behind an open door or blocked by a curtain may be less useful. Avoid positioning it where the user must stretch across the threshold or twist awkwardly to reach it.
A vertical bar near the entrance may help someone establish a handhold while moving from standing outside the shower to standing inside. An angled bar may suit a particular reach or movement pattern. Neither orientation is automatically right for every person or shower.
The entrance bar should complement not replace any support needed inside the shower. If the person has difficulty standing or turning after entering, assess the interior separately.
Grab Bar Placement on Shower Walls
Horizontal grab bars can provide a handhold along a suitable shower wall, particularly when a person needs support while standing or shifting position. Depending on the layout, the back wall and one side wall may be useful locations to assess.
Keep the intended gripping area accessible from the user’s normal standing or seated position. Check that the bar does not interfere with shower controls, shelves, dispensers, or the shower door. The user should not have to reach across a running water stream or move into an unstable position to grasp it.
If the shower has a seat, plan the bars around the way the person sits, stands, and transfers. Someone who remains seated may need a reachable handhold near the seat, while someone moving from a wheelchair may need support positioned to match the transfer direction. These arrangements should be based on the actual movement rather than a generic diagram.
A bar’s usefulness also depends on its length and clearance from the wall. The user must be able to grasp it securely without their hand being blocked by adjacent fixtures.
Grab bars are one part of creating a safer bathing area. For more guidance on reducing hazards when using a shower or bathtub, read our guide to shower and bathtub safety.
Are Horizontal or Vertical Grab Bars Better for Showers?
Neither horizontal nor vertical grab bars are universally best. Horizontal bars generally support a handhold along a wall, while vertical bars can provide a reachable grip during entry or changes in position. The right orientation depends on the movement, the user’s reach, the bar design, and any applicable accessibility requirements.
- Horizontal: Consider when the user needs a handhold while standing, shifting along a wall, or lowering and rising in a configuration designed for that purpose.
- Vertical: Consider when a person needs to grasp a bar at different heights or establish support near an entrance.
- Angled: Consider when a sloped grip better matches the user’s hand movement or body position, provided the product and mounting arrangement are suitable.
For accessible showers covered by the ADA Standards, the required grab-bar configuration depends on the specific shower type. A residential installation should not assume that any orientation satisfies every accessible-shower requirement. When a project must comply with accessibility standards or building codes, follow the provisions that apply to that configuration.
4. Where to Place Grab Bars in a Bathtub
Bathtub grab bars should support the movements involved in entering the tub, lowering into it, sitting or bathing, and getting out. Because a tub has a raised rim, its grab-bar arrangement may need to address both stepping over the edge and moving into or out of a seated position.
Grab Bars Along the Bathtub Wall
A horizontal grab bar along the long wall of a bathtub can provide a handhold when a person lowers themselves into the tub or rises again. Its position should match the user’s reach and movement, with enough unobstructed gripping space to use it comfortably.
Think about the user’s preferred bathing position, where they sit or stand, and how they move when entering and leaving the bathtub. A bar that is positioned too far from the user’s normal sitting position may offer little practical support.
For accessible bathtub configurations covered by the ADA Standards, the required arrangement depends partly on whether the tub has a permanent seat or is designed for a removable in-tub seat. These configurations have specific requirements for the number, length, and location of grab bars. For example, the standards specify a horizontal grab bar height of 33–36 inches above the finished floor for the applicable upper back-wall bar, while the lower back-wall bar is measured relative to the tub rim. See the U.S. Access Board’s ADA bathing-room guidance.
Grab Bars Near the Faucet and Tub Entrance
A grab bar near the bathtub entrance may help someone maintain a secure grip while stepping over the rim. The useful position depends on the direction of entry, the tub’s shape, and whether the person approaches from the side or transfers from a seat or mobility aid.
A vertical or angled bar may suit an individual who needs a handhold during a stepping movement. However, the bar should not obstruct the faucet, controls, or the space needed to move safely. Keep the gripping surface accessible from the user’s approach position.
Do not place a bar simply because a section of wall is available. Check whether the user can reach it before beginning the movement and continue holding it without twisting awkwardly. If the person needs to transfer from a wheelchair or another seat, the position should be planned around that specific transfer.
Grab Bar Placement for a Bathtub With a Seat
Grab-bar placement around a bathtub with a seat should match how the person transfers onto the seat and moves between sitting and standing. A permanent seat and a removable in-tub seat create different positioning needs, so they should not automatically use the same arrangement.
For a permanent seat, support may be needed along the back wall and near the control end. For a removable seat, the user may need support while positioning the seat, lowering onto it, or transferring out of the tub. The arrangement must account for the seat’s actual location and the user’s reach.
The ADA Standards specify different grab-bar configurations for bathtubs with permanent seats and those without permanent seats. These provisions are relevant to covered accessible installations; they should not be treated as a universal layout for every private bathroom. Consult the applicable requirements before using an accessible bathtub diagram as an installation plan.
5. Where Should You Position Grab Bars Beside and Behind a Toilet?
Grab bars around a toilet are commonly positioned beside the toilet, behind it where appropriate, or in a configuration that supports the user’s preferred transfer direction. Their purpose is to provide a stable handhold when lowering onto the seat, rising from it, or moving between the toilet and another surface.
Side Grab Bar Placement
A side grab bar is typically mounted on the wall next to the toilet so the user can grip it while seated and hold on to it when lowering down or getting back up. The best side depends on the bathroom layout, the user’s stronger or preferred hand, and whether they approach the toilet from the left or right.
Before choosing the position, check the distance between the toilet and the wall, nearby cabinets, toilet-paper holders, and other fixtures. The bar should be reachable without forcing the user to lean excessively or twist their torso.
A side bar can be particularly important when a person needs help pushing up from a seated position. However, its usefulness depends on the person’s movement and the bar’s design. If a wheelchair transfer is involved, the arrangement should leave the necessary transfer space clear rather than placing a bar where it obstructs movement.
Rear Grab Bar Placement
A rear grab bar may provide additional support behind the toilet, particularly in an accessible toilet configuration. Its position and length must account for the toilet’s location, the user’s reach, and any nearby fixture that could interfere with the gripping area.
Under the ADA Standards, accessible water closets generally require grab bars on the side wall and rear wall, subject to the applicable provisions and exceptions. The rear bar is not automatically a substitute for side support: each bar serves a different position around the toilet.
For covered accessible installations, the U.S. Access Board specifies a rear grab bar at least 36 inches long in the standard configuration, with defined extensions relative to the toilet centerline. The side bar has its own length and positioning requirements. These dimensions should be checked against the exact toilet-room configuration rather than applied to every household toilet. See the official ADA toilet-room guidance.
Toilet Grab Bar Height and Positioning
For grab bars covered by the general ADA height provision, the horizontal gripping surface is positioned 33–36 inches above the finished floor, measured to the top of the gripping surface. This reference applies to specified accessible installations, not every grab bar in every residential bathroom. The standards also make specific exceptions for some layouts, such as the lower grab bar mounted on a bathtub’s back wall.
In a home, consider the user’s seated reach, standing movement, toilet-seat height, and available wall support. A bar may meet a general measurement but still be poorly positioned for a particular person. If the bathroom is being designed or altered to meet accessibility requirements, use the applicable standards and local code rather than relying on a general household recommendation.
Grab bars can make sitting down and standing up easier when they are correctly positioned and securely installed. For more ways to reduce risks around the toilet, explore these practical toilet safety tips.
6. Bathroom Grab Bar Height, Length, and Positioning
The correct height, length, and orientation depend on where the grab bar is installed and what movement it is intended to support. Measurements should be checked alongside reach, clearance, mounting support, and the relevant accessibility requirements.
What Is the Recommended Height for Bathroom Grab Bars?
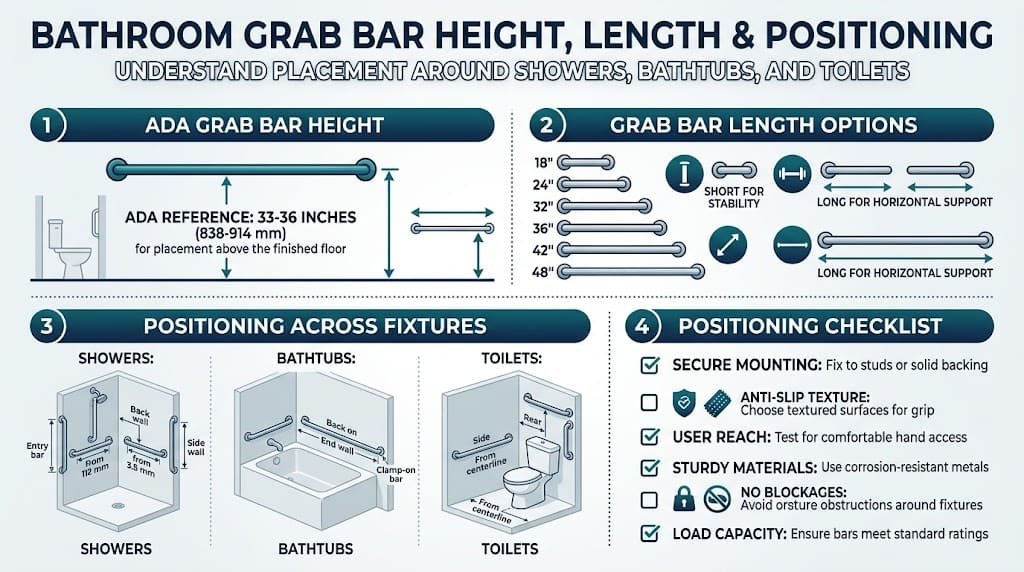
For applicable ADA grab bars, the standard horizontal gripping surface is 33–36 inches (840–915 mm) above the finished floor, measured vertically from the finished floor to the top of the gripping surface. This is an accessibility-standard measurement, not a universal height recommendation for every residential grab bar.
The distinction matters because different locations may use different reference points. A horizontal bar on a toilet-room wall is generally measured from the finished floor, while a lower back-wall grab bar in an accessible bathtub configuration is positioned relative to the bathtub rim. In residential bathrooms, grab bar placement should be tailored to the user’s posture, reach, and movement needs.
Use the table below as a reference, not as a substitute for the applicable standard or an individualized assessment.
| Location or use | Measurement consideration | Important qualification |
|---|---|---|
| Accessible toilet grab bars | Generally 33–36 inches to the top of the gripping surface above the finished floor | Confirm the applicable toilet-room provisions |
| Applicable upper bathtub back-wall bar | Generally 33–36 inches above the finished floor | The lower parallel bar uses a separate tub-rim measurement |
| Shower grab bars | Height depends on the shower configuration and applicable requirements | Seat and entry arrangements can affect the required layout |
| Residential support bar | Consider reach, balance, and the movement being supported | Do not assume one height suits every user |
The ADA height range comes from Section 609.4 of the 2010 ADA Standards for Accessible Design. Always confirm the provisions for the specific fixture and configuration.
After choosing the right location, check the measurements before installing the bar. Our guide to bathroom grab bar height explains how to measure from the correct reference point and understand height considerations for showers, bathtubs, and toilets.
Horizontal, Vertical, and Angled Grab Bar Placement
Grab-bar orientation should reflect how the person needs to use the bar. The shape and direction of the bar influence where someone can grasp it, but orientation alone does not establish whether the installation is suitable.
- Horizontal bars provide a grip along a wall and are commonly used where the user needs support while standing, sitting, or rising.
- Vertical bars can provide a handhold at different heights and may be useful near an entry or during a stepping movement.
- Angled bars can follow a person’s natural hand movement when lowering or rising, depending on their reach and positioning.
Length matters, too. A bar must extend far enough to be useful from the intended position, while leaving the necessary clearance around controls, seats, doors, and other fixtures. Its mounting points must also be compatible with the wall structure and the product’s installation instructions.
For accessible installations, do not select an orientation based only on general advice. The ADA Standards specify horizontal bars for many applications but also include particular configurations and exceptions. Check the relevant provision for the fixture being installed.
How to Choose the Right Position for the User
The most useful position is one the person can reach and hold during the movement that requires support. Before finalizing the layout, consider:
- Reach: Can the user grasp the bar from their normal starting position without stretching or leaning excessively?
- Preferred hand: Consider which hand the person feels most comfortable using to hold the grab bar for balance and support.
- Balance and mobility: Does the person need help stepping, turning, lowering, standing, or transferring?
- Seat height and location: Does the bar remain accessible when the person is seated on a shower chair, bathtub seat, or toilet?
- Transfer direction: Will the person move from the front, side, or another surface?
- Obstructions: Will a door, curtain, control, dispenser, or fixture interfere with gripping the bar?
When mobility needs are complex, an occupational therapist or qualified accessibility professional can help assess the user’s movements and bathroom layout. This is particularly helpful when planning for wheelchair transfers, restricted reach, or multiple mobility challenges that affect how a person uses the bathroom.
7. ADA Grab Bar Placement vs. Residential Bathroom Placement
ADA grab bar placement is governed by specific accessibility requirements for covered facilities and configurations. Residential bathroom placement is often guided by the needs of the person using the bathroom, the available space, product instructions, and applicable building codes.
The ADA Standards contain detailed requirements for accessible toilet rooms, showers, and bathtubs. These include the position, length, height, and arrangement of grab bars, with some requirements varying according to the fixture configuration. The U.S. Access Board provides guidance for toilet rooms and bathing rooms.
A private residential bathroom is not automatically subject to every ADA requirement simply because it includes grab bars. However, accessibility obligations may apply depending on the property, its use, the project, and relevant federal, state, or local requirements. Building codes and other accessibility rules may also affect the installation.
For a typical home, use the user’s movements to guide practical placement while ensuring that each bar has appropriate mounting support. For a project that must meet an accessibility standard, follow the precise requirements for that bathroom type. When the legal or technical requirements are uncertain, confirm them with the relevant building official or a qualified accessibility professional before installation.
8. What to Check Before Installing Bathroom Grab Bars
Correct placement is only part of a safe installation. A grab bar must also be attached using a mounting method suitable for the wall and the product. Before drilling, confirm the proposed location, structural support, clearances, and installation instructions.
Confirm Wall Support and the Mounting Method
Identify the wall construction and determine how the grab bar will be securely attached. Depending on the wall, this may require locating studs, using suitable reinforcement, or following a mounting system specifically approved for that installation.
A grab bar may appear firmly attached, but that alone does not guarantee a safe installation. Ensure the mounting system is suitable for the wall material and can support the forces the grab bar is expected to handle. Follow the manufacturer’s instructions for fasteners, spacing, and installation.
Standard towel racks are not built to provide the support needed for safe gripping or bearing body weight. Likewise, do not assume that a suction-mounted handle provides the same support as a permanently installed grab bar. Choose a grab bar and installation system designed to provide the type of support needed.
If the wall structure is uncertain, the installation instructions do not cover the existing surface, or the bathroom has tiled walls that make mounting difficult, seek help from a qualified installer before proceeding.
Check Clearances and Nearby Fixtures
Inspect the surrounding area to make sure the grab bar will fit properly before installing it. The user needs enough room to grasp the bar without their fingers being blocked by the wall, a nearby fixture, or another object.
Review the following:
- Shower controls, faucets, and showerheads.
- Doors, shower curtains, and enclosure tracks.
- Toilet-paper holders, cabinets, and dispensers.
- Shower seats, bathtub seats, and transfer areas.
- The user’s approach path and normal hand position.
Also check that the bar does not interfere with required clear floor space or accessible transfers. For installations covered by the ADA Standards, clearance and gripping-space provisions may be as important as the bar’s height and length.
Verify the Installation Before Use
After installation, follow the manufacturer’s inspection and maintenance instructions. Check that the bar is correctly mounted, its fittings do not rotate, and the gripping surface is free of sharp edges or other hazards.
A grab bar’s secure installation cannot be confirmed by its appearance alone. If it moves, loosens, or causes concern during inspection, do not use it for support until the problem has been assessed and corrected. Avoid testing an uncertain installation by placing a person’s full weight on it.
If the bar feels unstable or the wall material is damaged, stop using it and have the installation checked. A qualified installer can determine whether the mounting method, wall support, or installation itself needs to be corrected.
9. Bathroom Grab Bar Placement Checklist
Use this checklist before finalizing grab bar locations or arranging an installation.
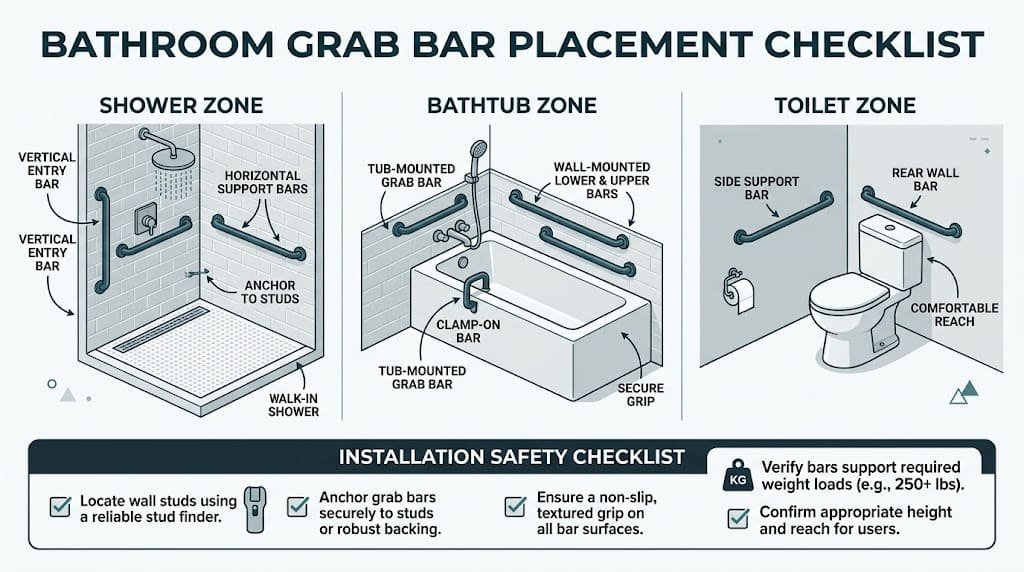
- Identify the movements that need support, such as entering, sitting, standing, or transferring.
- Assess the shower, bathtub, and toilet separately.
- Choose locations the user can reach from their normal position.
- Decide whether horizontal, vertical, or angled bars suit the intended movement and applicable requirements.
- Confirm that the grab bar’s height, length, and placement meet the applicable safety standards and the manufacturer’s installation guidelines.
- Confirm wall structure, reinforcement, and mounting-system compatibility.
- Check clearances around doors, controls, seats, and nearby fixtures.
- Follow the manufacturer’s installation and inspection instructions.
- Reassess the placement after the bathroom is in use and the user’s needs become clearer.
10. FAQs
How Many Grab Bars Does a Bathroom Need?
The number of grab bars needed varies from one bathroom to another. It depends on the bathroom’s design, the presence of a shower or bathtub, the user’s individual support needs, and any applicable accessibility standards. Instead of selecting a fixed number, evaluate each bathroom area and identify where additional support is needed.
Is every bathroom wall suitable for installing a grab bar?
No. Bathroom grab bars should only be mounted on walls that can support them with a suitable installation method designed for the wall material and specific product. Make sure the chosen position provides a comfortable, secure grip without interfering with nearby fixtures. If you are unsure whether the wall can safely support the bar or which mounting method to use, have a qualified installer assess it before installation.
Should grab bars be horizontal or vertical?
The best grab bar orientation depends on how the user plans to use it. Horizontal bars provide support along a wall, vertical bars can help with entering or changing positions, and angled bars may better accommodate certain movements. For bathrooms that must meet accessibility standards, choose a layout that complies with the applicable requirements rather than relying on personal preference alone.
11. Conclusion
A safer bathroom grab bar setup begins by determining where support is needed most, including the shower, bathtub, and toilet. Choose positions and orientations that match their reach and movement, verify the relevant measurements and clearances, and make sure the wall and mounting method are suitable. When accessibility requirements or mobility needs are complex, get qualified guidance before installation.
3 Comments