
1. Introduction
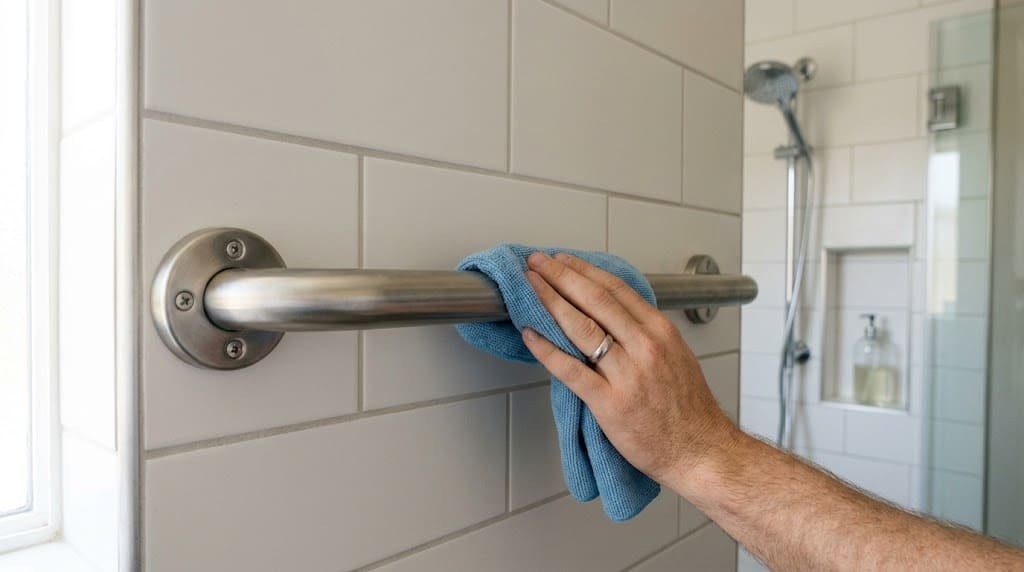
Bathroom grab bar maintenance involves inspecting the bar, mounting hardware, and surrounding wall; cleaning the surface correctly; and addressing signs of wear or damage before relying on the bar for support. Because grab bars help people maintain balance and move safely around showers, bathtubs, and toilets, their condition matters as much as their placement. A bar that looks clean may still have loose fasteners or damaged wall anchors.
This guide explains how to check bathroom grab bars, recognize warning signs, clean different finishes safely, and decide when professional repair or replacement may be necessary. If a grab bar moves, wobbles, or shows signs of mounting damage, do not use it for support until the problem has been assessed and corrected.
Table of Contents
2. Why Regular Bathroom Grab Bar Maintenance Matters
Regular maintenance helps identify visible damage, corrosion, loose mounting components, and moisture-related problems that could compromise a grab bar’s reliability. It cannot guarantee that an installation is structurally sound, but it can help you recognize when further assessment is needed.
A bathroom grab bar consists of more than the metal or plastic-covered bar itself. Its mounting plates, fasteners, anchors, supporting wall, and installation method all contribute to its ability to provide support.
How wear, moisture, and mounting problems can affect grab bars
Bathrooms expose grab bars to humidity, splashing water, soap residue, cleaning products, and frequent contact. Over time, these conditions may affect the bar’s finish, grip surface, mounting hardware, or surrounding materials.
Common maintenance concerns include:
- Loose mounting components: Fasteners may loosen, or anchors and other mounting components may fail.
- Corrosion: Rust, pitting, or finish deterioration can develop when the material or protective coating is damaged or exposed to incompatible cleaning products.
- Wall damage: Cracked tile, deteriorating grout, damaged drywall, or weakened backing can affect the mounting area.
- Moisture intrusion: Water entering gaps around mounting points may contribute to deterioration behind the visible surface.
- Grip deterioration: Worn coatings, peeling finishes, or sharp edges may make the bar uncomfortable or unsafe to grasp.
A problem in one component can affect the performance of the entire installation. For example, tightening a fastener will not correct a damaged wall anchor or inadequate structural backing.
Why a clean appearance does not prove that a grab bar is secure
Cleaning removes dirt, soap film, and water spots, but it does not verify the strength of the mounting system. A polished grab bar can still have loose fasteners, concealed wall damage, or an installation problem.
Visual inspection has limitations, too. Some mounting defects occur behind the wall surface or underneath a mounting plate, where they cannot be seen during routine household checks.
Treat cleaning and safety inspection as separate tasks. Cleaning helps maintain the surface, while inspection looks for warning signs that may require professional evaluation. Neither should be considered proof of structural capacity.
When to inspect a grab bar outside your normal routine
Inspect the grab bar and its surroundings when something happens that could affect the installation, even if your regular maintenance check is not due.
Additional checks are appropriate after:
- A plumbing leak or water intrusion near the mounting area.
- Bathroom renovations, tile work, or changes to the surrounding wall.
- An impact against the grab bar or mounting plate.
- Unexpected movement, wobbling, or rotation.
- Newly visible cracks, gaps, corrosion, or damaged sealant.
- Work involving nearby plumbing or wall-mounted fixtures.
If an event suggests that the mounting system may have been compromised, do not rely on the grab bar while waiting for an inspection. Arrange an appropriate assessment before using it again.
3. How to Check Bathroom Grab Bars Step by Step
To check bathroom grab bars, examine the bar, mounting hardware, surrounding wall, and visible signs of movement or deterioration. Follow the manufacturer’s maintenance instructions and avoid tests that place your body weight on a potentially compromised installation.
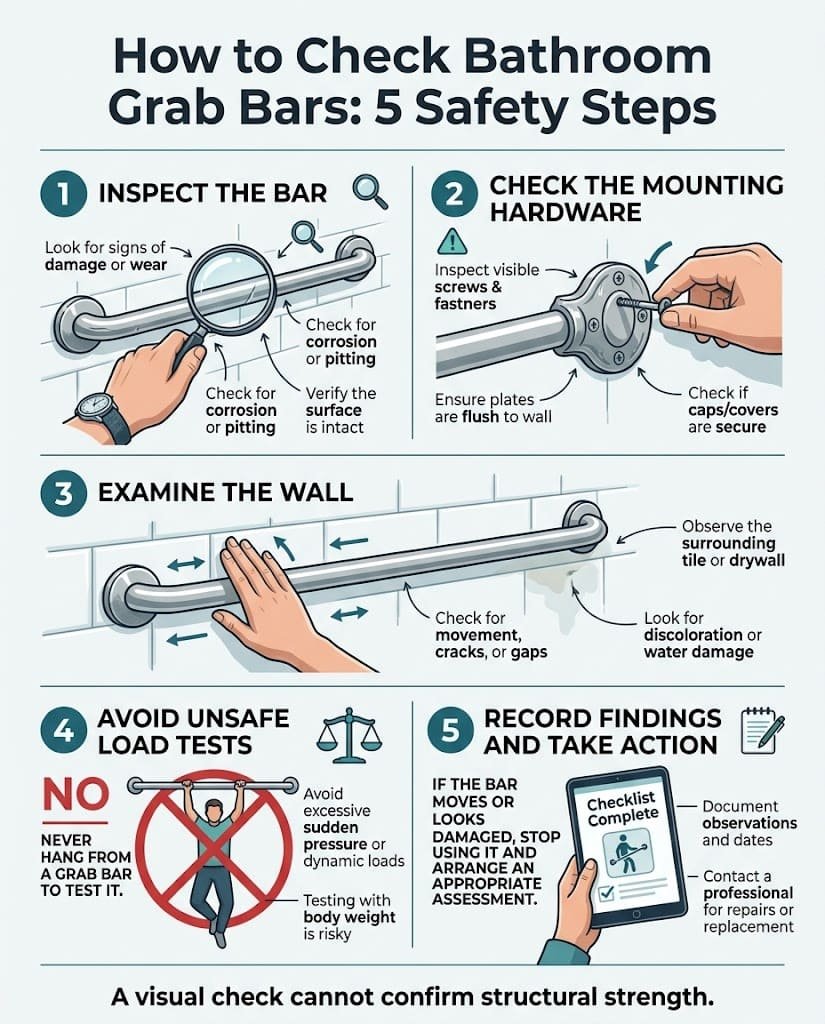
The following process is intended for routine observation, not a formal structural inspection or certification.
Step 1 — Inspect the bar and grip surface
Begin with the entire exposed surface. Look along the bar’s length and around bends, joints, end caps, and connection points.
Check for:
- Cracks, bends, deformation, or other visible damage.
- Rust, pitting, discoloration, or deteriorating protective coatings.
- Peeling material, rough patches, burrs, or sharp edges.
- Loose end caps or visibly damaged fittings.
- Worn or damaged nonslip grip surfaces, if present.
Pay attention to areas where water regularly collects or where the bar contacts other fixtures. Damage may be concentrated around joints, corners, or frequently handled sections.
Do not assume that every discoloration indicates structural failure. Some marks may be cosmetic, but pitting, flaking coatings, or sharp edges deserve closer assessment, especially when the material underneath may be affected.
Step 2 — Examine mounting plates, fasteners, and fittings
Look at each mounting point and the visible hardware securing the bar. Depending on the model, the installation may use exposed screws, concealed fasteners, mounting flanges, or other manufacturer-specified components.
Check for:
- Missing or visibly loose-looking fasteners.
- Gaps between the mounting plate and the wall.
- A mounting plate that appears tilted or displaced.
- Cracks or deformation around the connection points.
- Rust or other deterioration on visible hardware.
- Movement or separation where the bar meets its mounts.
Do not remove mounting plates or dismantle the installation simply to inspect behind them unless you are qualified to do so and can follow the manufacturer’s instructions. Removing components may disturb seals or mounting connections.
If a fastener appears loose or the mounting plate has shifted, do not assume that tightening it will solve the problem. The underlying anchor, backing, or wall may also be damaged.
Step 3 — Check the surrounding wall, tile, grout, and sealant
The wall and its supporting structure are essential parts of the installation. Examine the surfaces around every mounting point, including tile, grout, sealant, and any exposed wall material.
Look for:
- Cracked or loose tiles.
- Crumbling or missing grout.
- Gaps between the mounting plate and wall.
- Peeling, split, or deteriorated sealant.
- Soft, swollen, stained, or visibly damaged wall surfaces.
- Water stains or recurring dampness around the mounting area.
A small amount of deteriorated sealant does not automatically mean the grab bar is structurally unsafe. However, water intrusion near a mounting point can indicate a problem that needs further investigation.
Do not simply cover a gap with fresh caulk and assume the installation is secure. Sealant helps manage moisture in appropriate applications, but it does not replace structural mounting hardware or repair damaged wall backing.
Step 4 — Perform a cautious stability check when appropriate
A stability check should never involve hanging from the grab bar, jerking it, pulling forcefully, or placing your full body weight on it to see whether it holds.
Start with visual observations of the mounting points and surrounding wall. If the manufacturer’s instructions provide a specific, low-force check suitable for the product, follow those instructions only when there are no visible warning signs and you can perform the check safely.
Do not attempt a stability test if the bar has visible damage, loose-looking mounts, wall cracks, gaps, or any history of unexpected movement. If you notice movement during an appropriate check, stop immediately and take the bar out of service.
Formal structural requirements are not equivalent to a household stability test. For example, the ADA Standards for Accessible Design include structural-strength requirements for applicable grab bar installations. Those requirements should not be interpreted as instructions to test a household grab bar by applying a specified weight or force yourself.
When structural security is uncertain, a qualified installer or other appropriate professional should evaluate the installation and determine what corrective work is necessary.
Step 5 — Record the findings and identify any follow-up work
Keep a simple record of the inspection, particularly for grab bars used regularly by someone who depends on them for balance or transfers.
Your record can include:
- The location of the grab bar, such as the shower, bathtub, or toilet area.
- The date of inspection.
- Visible surface or finish concerns.
- The condition of the mounting plates and surrounding wall.
- Any moisture, corrosion, or movement observed.
- The action taken and whether further assessment is required.
Photographs can help document changes over time, but they cannot establish mounting strength. If a defect is found, record it and arrange appropriate corrective work rather than continuing to use the bar while monitoring the problem.
4. Bathroom Grab Bar Inspection Checklist
A bathroom grab bar inspection checklist helps you review the same areas consistently. Use it to identify visible concerns, document maintenance, and decide whether the installation needs further assessment.
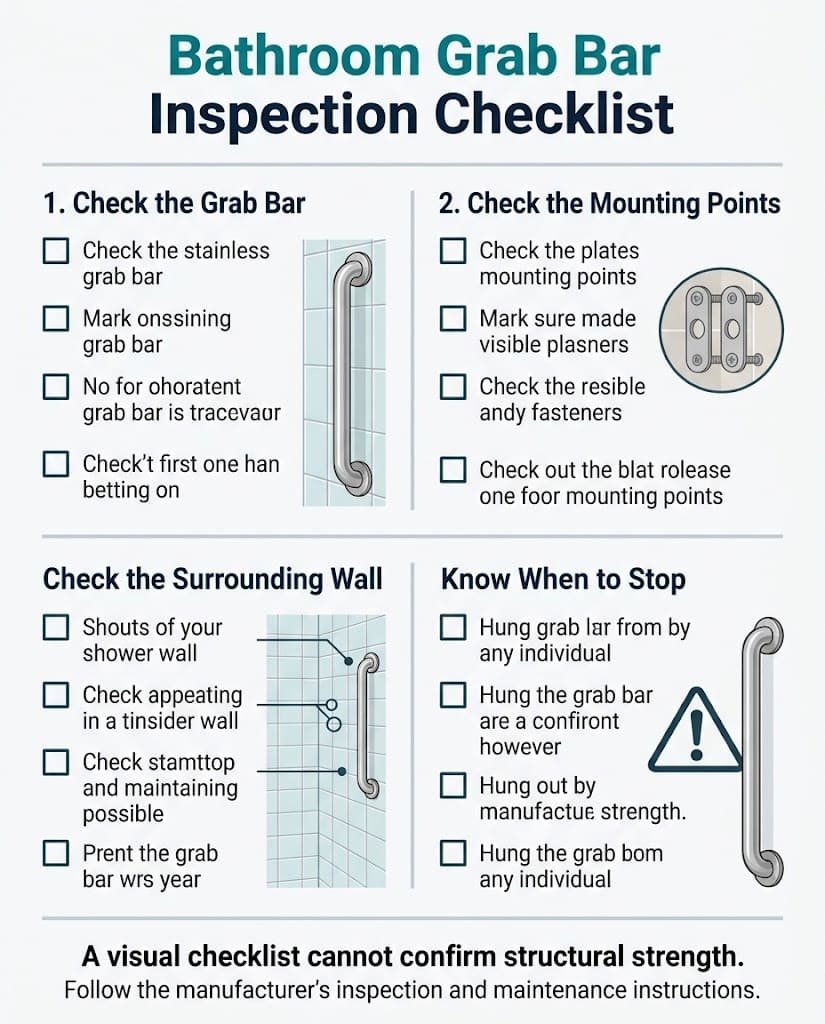
What to check on the grab bar itself
Review the following items:
- The bar has no visible cracks, bends, or deformation.
- The gripping surface is intact and free from sharp edges.
- There is no significant rust, pitting, or deteriorating finish.
- End caps, joints, and visible fittings appear intact.
- The surface is clean and suitable for the product’s intended grip.
- No visible damage suggests that the bar may need professional assessment.
What to check at the mounting points and surrounding wall
Inspect each mounting location and the materials around it.
- Mounting plates appear aligned and seated as intended.
- No fasteners appear missing or displaced.
- The mounting points show no noticeable separation, shifting, or looseness.
- Tile and grout show no obvious damage around the installation.
- Sealant, where present, has no obvious deterioration or separation.
- There are no visible signs of water intrusion or wall damage.
- No unexpected movement has been observed during normal use.
What findings require the bar to be taken out of service
Do not use a grab bar for support if it wobbles, shifts, rotates unexpectedly, separates from the wall, or has visible damage that may affect its strength. The same precaution applies when mounting hardware appears compromised or water damage raises concerns about the supporting structure.
| Finding | Why it matters | Safe next action |
|---|---|---|
| Bar moves or wobbles | The mounting system or supporting surface may be compromised. | Stop using the bar and arrange an appropriate assessment. |
| Mounting plate separates from the wall | Fasteners, anchors, backing, or the wall may have failed. | Keep the bar out of service until repaired and checked. |
| Cracked tile or damaged wall around a mount | The condition of the supporting area may be affected. | Have the mounting area assessed before relying on the bar. |
| Rust, pitting, or peeling finish | Material deterioration or surface damage may be present. | Follow the manufacturer’s guidance and seek assessment if integrity is uncertain. |
| Sharp edges or damaged grip coating | The surface may injure the user or reduce grip comfort. | Avoid using the affected bar until the problem is resolved. |
| Minor surface marks with no other warning signs | The issue may be cosmetic, depending on the material. | Clean according to product instructions and monitor the condition. |
A completed checklist is a record of visible observations, not proof that a grab bar can safely support a particular load. Concealed mounting defects may require a professional inspection to identify.
5. How to Keep Bathroom Grab Bars Clean and in Good Condition
The safest way to clean a bathroom grab bar depends on its material, finish, and manufacturer’s instructions. In many cases, a soft cloth and a compatible mild cleaning solution are sufficient, but no single cleaner or polishing method is appropriate for every product.
Cleaning should remove residue without damaging the finish, grip surface, or nearby sealant.
How to clean stainless steel bathroom grab bars
For stainless steel grab bars, begin by checking the manufacturer’s cleaning instructions. If permitted, use a soft cloth or nonabrasive sponge with mild soap and water.
A practical cleaning process is:
- Use the manufacturer’s instructions to determine how to apply the recommended cleaner to the grab bar or cleaning cloth.
- Wipe the bar gently, paying attention to areas where hands commonly grip it.
- Clean along the surface grain when the finish has a visible directional grain.
- Rinse the surface when the manufacturer’s care instructions call for it to remove any remaining cleaning solution.
- Wipe the surface dry using a fresh, nonabrasive microfiber cloth.
Avoid steel wool, abrasive scouring pads, and harsh cleaners that may scratch the finish or damage its protective surface. Chloride-containing products, including some cleaners containing bleach, can damage certain stainless steel grades or finishes under some conditions.
Do not assume that a product labeled for general bathroom use is suitable for every stainless steel grab bar. Check compatibility before applying it, particularly if the bar is used in a wet shower environment.
How to care for coated metal and other grab bar finishes
Powder-coated metal, painted surfaces, textured grips, plastic components, and other finishes may respond differently to cleaning products.
For these materials:
- Follow the product’s specific care instructions.
- Choose gentle cleaning tools and materials, and follow the manufacturer’s care instructions for any specific requirements.
- Do not use harsh cleaning powders, rough scrubbers, or solvents unless the manufacturer specifically approves them.
- Do not use strong chemicals simply because they remove stubborn stains.
- After cleaning, check the surface for any peeling, cracks, color changes, or worn areas where the original texture has deteriorated.
If the grab bar has a textured or nonslip coating, aggressive scrubbing may damage the surface intended to improve grip. If the finish begins to peel or the bar develops rough or sharp areas, contact the manufacturer or an appropriate professional for guidance.
Never apply oil, wax, or a polishing product that leaves the gripping surface slippery unless the manufacturer explicitly approves it for that application.
How to remove soap residue, water spots, and mineral buildup safely
Soap film and hard-water deposits can make grab bars look dull or feel unpleasant to touch. Choose a cleaning approach based on the grab bar’s material and the kind of buildup you need to remove.
Begin by using a gentle cleaning solution approved by the manufacturer, along with a soft, non-abrasive cloth. If the deposits remain, check whether the manufacturer permits a specific mineral-removal product before using it.
Avoid scraping deposits with metal tools or applying acidic cleaners, descalers, or concentrated chemicals without confirming compatibility. Such products may damage certain finishes, nearby grout, sealant, or other bathroom materials.
If deposits return quickly, routine wiping and drying may reduce buildup. Persistent staining, pitting, or discoloration should not automatically be treated as surface dirt because it may indicate material deterioration.
How to reduce moisture-related deterioration
Moisture control helps protect the grab bar, its finish, and the surrounding mounting area.
After showering or bathing:
- Wipe away standing water when practical.
- Dry the grab bar using a soft cloth if the manufacturer recommends it.
- Keep the bathroom adequately ventilated.
- Check for recurring dampness around mounting plates.
- Address plumbing leaks and water intrusion promptly.
- Maintain surrounding sealant according to the relevant product instructions.
Do not rely on sealant alone to protect an improperly mounted grab bar. If water repeatedly appears around a mounting plate or the surrounding wall shows signs of damage, investigate the source rather than repeatedly cleaning or resealing the area.
6. Signs of an Unsafe Bathroom Grab Bar
The most important warning signs are unexpected movement, damaged mounting points, deterioration of the bar, and damage to the supporting wall. Some surface marks may be cosmetic, but movement or suspected mounting failure means the bar should not be used for support until assessed.
Wobbling, rotation, or movement at the mounting points
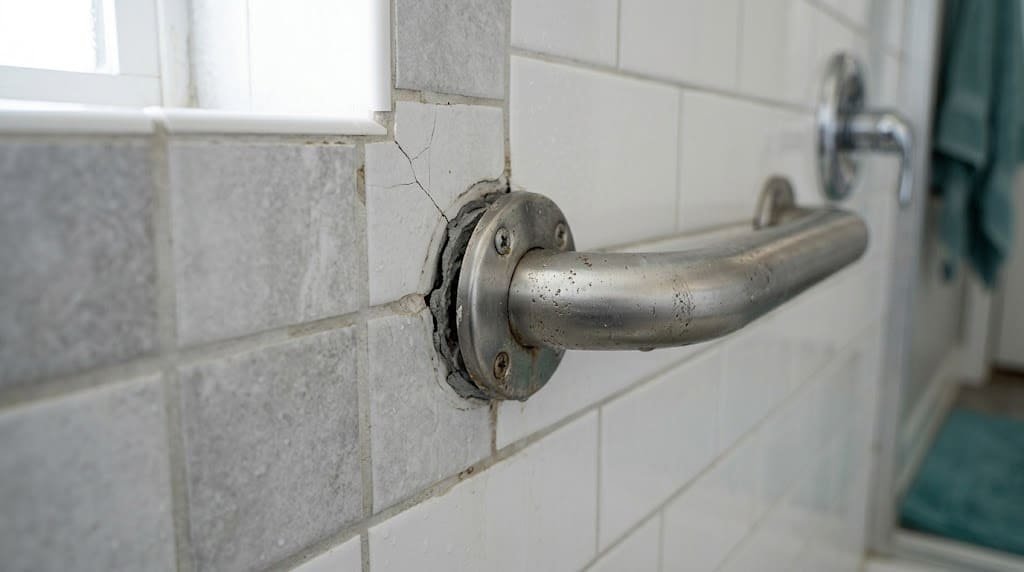
A properly installed grab bar should not wobble or rotate unexpectedly during its intended use. Movement may indicate loose fasteners, failed anchors, damaged structural backing, or a deteriorated mounting surface.
Even slight movement deserves attention because the visible motion may not reveal the extent of the underlying problem. Do not try to determine whether the bar can still support you by pulling harder or leaning on it.
Stop using it, warn other household members, and arrange an appropriate inspection.
Loose-looking fasteners, gaps, and damaged wall surfaces
Missing screws, shifted mounting plates, visible gaps, cracked tile, or damaged wall materials can indicate a mounting problem. However, not every visible gap proves that the grab bar is unsafe; some designs use covers or mounting details that differ from others.
Compare what you observe with the product’s installation instructions, but do not dismantle the mounting system unless you are qualified to do so.
If the wall is cracked, damp, soft, or deteriorating near the mounting points, have the condition evaluated. Simply tightening a screw or adding sealant may hide the symptom without correcting the cause.
Rust, pitting, cracks, peeling finishes, or sharp edges
The seriousness of surface damage depends on the bar’s material, construction, and location of the defect.
Light surface discoloration may be cosmetic, while deep pitting, cracks, deformation, or peeling material may indicate a more significant problem. Sharp edges or damaged grip surfaces can also create an injury risk.
Clean the grab bar with a manufacturer-recommended cleaning method, then evaluate any visible damage by following the product’s care and safety instructions. If you cannot determine whether the bar’s integrity or grip has been affected, stop relying on it until the issue has been evaluated.
Water intrusion or recurring damage around the mounts
Recurring dampness, water stains, deteriorating sealant, or damaged wall materials near a mounting point may indicate a leak or inadequate moisture protection.
Water intrusion matters because some mounting systems depend on the condition of the material behind the finished wall. The problem may affect parts of the structure that cannot be seen from inside the bathroom.
Do not cover recurring water damage with fresh sealant and consider the problem resolved. Identify and correct the moisture source, then have the mounting system assessed if its integrity may have been affected.
7. What to Do if a Bathroom Grab Bar Is Loose
If a bathroom grab bar is loose, stop using it for support and arrange an assessment of the bar, mounting hardware, and supporting wall. Do not assume that tightening a screw will restore safety.
Why a loose grab bar should not be used for support
A grab bar is intended to provide a reliable handhold during movement, balance adjustments, and certain transfers. If it moves unexpectedly, it may shift when someone depends on it, increasing the risk of losing balance or falling.
Do not continue using the bar because the movement seems minor or because it still feels strong under light pressure. Avoid testing it with your body weight, and tell anyone who may rely on it that it is out of service.
If the grab bar is the person’s main support for getting in or out of the shower, bathtub, or toilet area, arrange a safer alternative before the next transfer. Depending on the person’s needs, this may require assistance or advice from an appropriate mobility or accessibility professional.
Why tightening a screw may not solve the underlying problem
A loose fastener is only one possible cause of movement. The actual issue may involve:
- An anchor that has loosened or failed.
- Damaged or unsuitable wall backing.
- A mounting plate that was installed incorrectly.
- Deteriorated tile or other surrounding material.
- Corrosion or damage to the mounting hardware.
- A mismatch between the mounting system and the supporting surface.
Tightening a screw may be ineffective or may worsen the damage if the anchor or substrate has already failed. Using a larger screw, adding an improvised anchor, or applying adhesive is not a universal solution.
The correct repair depends on the specific grab bar, mounting method, wall construction, and condition of the installation.
When to call a qualified installer or other appropriate professional
Seek professional help when a grab bar moves, its mounting plate separates from the wall, the surrounding surface is damaged, or the cause of the problem is unclear.
Choose someone qualified to assess grab bar installations and the relevant wall construction. If water damage, structural deterioration, or concealed plumbing may be involved, additional expertise may be needed.
A professional assessment is especially important when the bar supports a person with limited mobility or is used during transfers. The objective is not merely to make the bar feel tight; it is to determine whether the mounting system and supporting structure are appropriate and sound.
What should be checked before the bar is used again
Before returning a repaired grab bar to service, the underlying problem must be addressed—not simply concealed.
The assessment and corrective work should establish that:
- The bar and its components are suitable for continued use.
- Damaged hardware or mounting components have been corrected or replaced as appropriate.
- The supporting wall and backing are in suitable condition.
- The installation follows the relevant product instructions and applicable requirements.
- The installer has checked the completed work using an appropriate method.
Do not perform a full-weight test yourself after a repair. Follow the professional’s guidance and the manufacturer’s instructions for determining when the bar is ready for use.
8. How Frequently Should You Check Your Bathroom Grab Bars?
There is no single inspection interval that is appropriate for every bathroom grab bar. Follow the manufacturer’s maintenance instructions and establish a practical household routine based on how often the bar is used, the bathroom environment, the installation type, and any previous problems.
Quick visual checks during routine bathroom care
Use routine bathroom cleaning as an opportunity to look for obvious changes. Check for new cracks, corrosion, gaps, missing components, damaged finishes, or signs of water intrusion.
These brief observations can help identify problems early without turning everyday cleaning into a complicated inspection. However, a visual check cannot confirm that concealed anchors or backing remain sound.
If you notice unexpected movement or a potentially serious defect, stop using the bar rather than waiting for the next scheduled check.
Periodic condition and stability checks
In addition to routine visual observations, set aside time to review the entire installation more carefully. Examine the bar, visible mounting components, wall surface, grout, and sealant, where applicable.
The appropriate frequency depends on the manufacturer’s guidance, the level of use, exposure to moisture, and previous maintenance concerns. A grab bar used frequently in a wet shower may need closer attention than one in a lightly used, dry area.
Do not interpret a household schedule as an official regulatory requirement. If the manufacturer specifies inspection or maintenance procedures, follow those instructions.
Situations that call for an additional inspection
Perform an additional inspection whenever an event may have affected the installation.
Examples include:
- A plumbing leak or recurring water intrusion.
- Bathroom remodeling or work on nearby walls and fixtures.
- An impact against the bar or mounting hardware.
- A newly noticed wobble or change in alignment.
- Visible corrosion, cracked tile, or deteriorating wall material.
- A repair or replacement involving the bar or its mounting system.
When the event could have compromised structural security, keep the bar out of service until the relevant concerns have been resolved.
9. When to Repair or Replace Bathroom Grab Bars
A grab bar may be repairable when the problem is limited to a replaceable component and the supporting structure remains suitable. Replacement may be necessary when the bar is damaged, incompatible components are involved, or the mounting system cannot be restored reliably.
The decision should be based on the condition of the entire installation, not just the appearance of the bar.
Problems that require professional assessment
Arrange an assessment if the bar moves, mounting hardware fails, wall material deteriorates, or moisture damage appears around the installation.
Professional evaluation is also appropriate when a repair would require changing anchors, opening a wall, replacing structural backing, or determining whether the existing mounting arrangement meets the product’s requirements.
Do not assume that a new bar will solve the problem if the original wall or mounting system remains unsuitable. The replacement installation must address the supporting structure as well as the visible fixture.
Signs that the bar, fittings, or mounting hardware may need replacement
Replacement may be appropriate when the bar has cracks, permanent deformation, significant pitting, damaged gripping surfaces, or components that are no longer suitable for use.
Other reasons may include:
- Mounting hardware that is damaged or cannot be restored appropriately.
- A finish that has deteriorated in a way that affects safe gripping.
- Components that are incompatible with the bar or installation.
- A product that the manufacturer has identified as unsuitable for continued use.
- A mounting system that cannot be secured reliably to the existing wall.
There is no universal service life for all bathroom grab bars. Material, product design, installation quality, exposure, use, and maintenance conditions all influence the decision. Follow the manufacturer’s replacement guidance and do not wait for a fixed age if damage appears earlier.
How to verify that corrective work has resolved the problem
After repair or replacement, confirm that the cause of the original problem has been addressed. The bar should be installed according to its product instructions, with appropriate mounting components and a suitable supporting structure.
The person completing the work should evaluate the installation using an appropriate method. Check that visible defects have been corrected and that there are no new signs of movement, gaps, or wall damage.
A fresh coat of paint, new sealant, or a tightened screw does not by itself prove that the installation is secure. If the original cause remains uncertain, obtain further assessment before relying on the grab bar.
10. Bathroom Grab Bar Maintenance Schedule
A practical maintenance schedule helps households remember routine cleaning, periodic inspection, and additional checks after events that could affect the installation. Use the schedule below as general guidance, not as a universal regulatory requirement. Manufacturer instructions take priority when they specify different procedures.
Daily-use observations and cleaning
During normal bathroom care, remove dirt and residue using a compatible cleaner and soft cloth. Where practical, observe the grab bar and surrounding area for new movement, damage, or moisture.
You do not need to conduct a full inspection every time you clean. The goal is to notice changes and respond promptly rather than overlooking a developing problem.
Periodic inspection and maintenance records
Establish a recurring inspection routine suited to the product, level of use, and bathroom conditions. Record findings when useful, especially if the bar is relied upon for daily mobility support.
| Task | Suggested timing | What to examine | When to seek help |
|---|---|---|---|
| Routine cleaning and observation | During regular bathroom care | Surface cleanliness, visible damage, moisture, and obvious changes | If movement, damage, or mounting concerns appear |
| More thorough visual inspection | At a practical interval based on product instructions and use | Bar condition, visible fasteners, mounting plates, tile, grout, and sealant | If the mounting system or supporting wall appears compromised |
| Review of previous findings | When maintaining household records | Changes since the last inspection and unresolved concerns | If a defect persists or worsens |
| Follow-up after corrective work | Before returning a compromised bar to use, as directed by the professional | Whether the identified problem has been corrected | If the installation’s suitability remains uncertain |
Event-triggered checks after leaks, renovations, impacts, or detected movement
Certain events call for immediate attention rather than waiting for the next routine inspection. After a leak, renovation, impact, or unexpected movement, examine the visible condition of the bar and its mounting area.
If the event could have affected the mounting system, do not rely on the bar until it has been appropriately assessed. A normal-looking surface does not rule out concealed damage.
Document the event, the findings, and any corrective work. This record can help identify recurring problems and provide useful context for an installer or other professional.
11. FAQs
How do you know if a bathroom grab bar is loose?
Warning signs include wobbling, rotation, movement at a mounting plate, visible gaps, or fasteners that appear displaced. Cracked tile or damaged wall material around the mounts may also indicate a problem. Do not pull forcefully or hang from the bar to test it. Stop using a bar that moves and arrange an appropriate assessment.
Can you tighten a loose bathroom grab bar yourself?
Not every loose grab bar can be safely fixed by tightening a screw. Movement may result from a failed anchor, damaged backing, unsuitable mounting hardware, or deterioration of the wall. Do not use improvised anchors, larger screws, or adhesive as a universal fix. If the cause is unclear or the installation is compromised, seek qualified help.
What is the safest way to clean stainless steel grab bars?
Follow the manufacturer’s care instructions. When permitted, use mild soap and water with a soft cloth, rinse if required, and dry the surface. Avoid steel wool, abrasive pads, and unapproved harsh or chloride-containing cleaners, which may damage some stainless steel grades or finishes. Confirm product compatibility before treating stubborn mineral deposits.
When should a bathroom grab bar be replaced?
Consider replacement when the bar has cracks, permanent deformation, significant corrosion, damaged grip surfaces, or components that cannot be restored appropriately. Replacement may also be necessary if the mounting system is unsuitable or the manufacturer advises discontinuing use. There is no universal replacement age; assess the product’s condition and the integrity of its installation.
Do suction-cup grab bars need the same checks as permanently mounted bars?
No. Suction-cup grab bars use a different attachment method and must be checked according to the manufacturer’s specific instructions, including requirements for the surface, attachment, and rechecking. They should not be assumed to provide the same support as permanently mounted grab bars. Never rely on a temporary suction-mounted product for weight-bearing support unless the manufacturer explicitly identifies it for that use and the installation meets its instructions.
12. Conclusion
Effective bathroom grab bar maintenance means checking the bar and its mounting system, cleaning the finish without damaging it, and responding promptly to warning signs. Wobbling, loose mounting plates, damaged wall materials, corrosion, and recurring moisture problems should never be ignored.
Routine visual checks can help you notice changes, but they cannot certify structural strength or reveal every concealed defect. Follow the manufacturer’s instructions, avoid unsafe do-it-yourself load tests, and arrange qualified assessment when the installation’s security is uncertain. If a grab bar is loose or damaged, stop using it for support until the problem has been corrected.
For more guidance on choosing and using grab bars safely, read BathSmartly’s Complete Guide to Bathroom Grab Bars and explore the site’s shower and bathtub safety guide.
2 Comments